Subscribe to The Feminine Touch Designs Newsletter for Instant News about more free patterns and discount codes
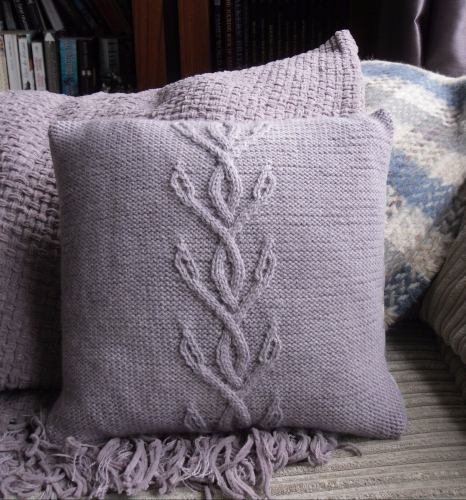 |

I made this lovely cushion cover for my living room out of some hand dyed DK yarn I had in my stash for some time. The colour matched my throw and curtains so it just had to be!
I backed the cushion with some pretty green and lilac tartan effect fabric but you can choose fabric that matches your own decor or knit a plain reverse stocking stitch back.
Thought I'd share !
Finished size: 14” x 14” when blocked
Yarn: 100 grams hand dyed Bluefaced Leicester Aran weight
Needles: 4.5 mm / US 7 / UK 7
Gauge: Approx 23 stitches, 26 rows = 10 cm / 4 inch in stocking stitch
Notions:- Cable needle
|
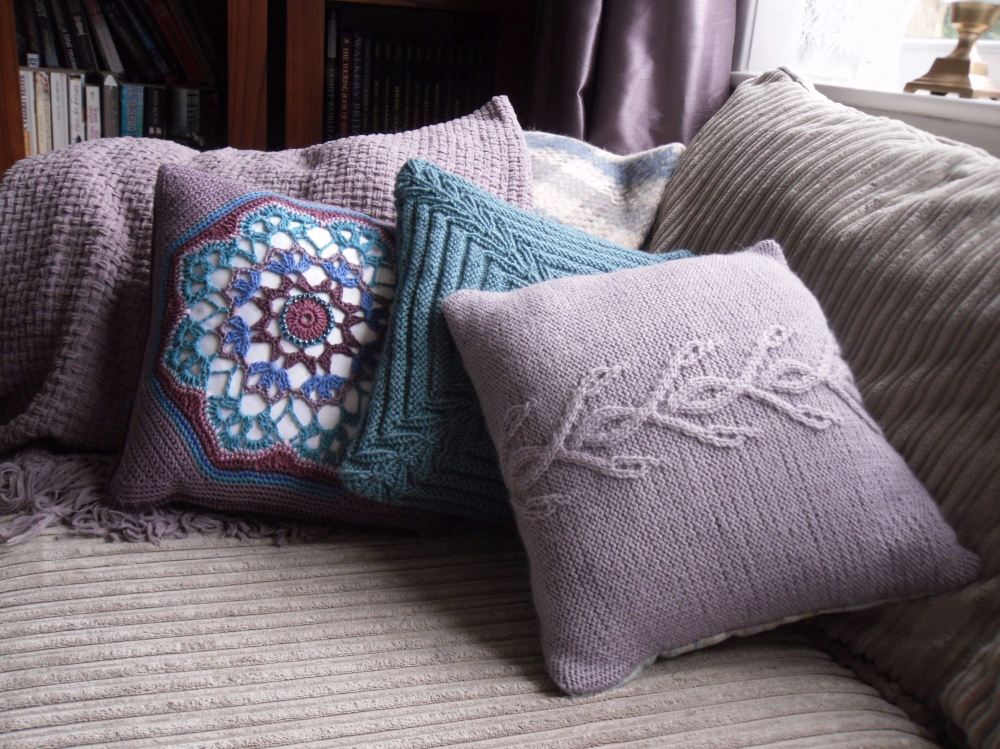
Here it is with my other crafty cushions and throws.
INSTRUCTIONS
Cast on 80 stitches using the cable cast on method.
Consists of 28 edging stitches, 24 pattern stitches and 28 edging stitches again.
The pattern below is just for the centre 24 stitches. The 28 edging stitches should be purled on the RS and Knit on the WS.
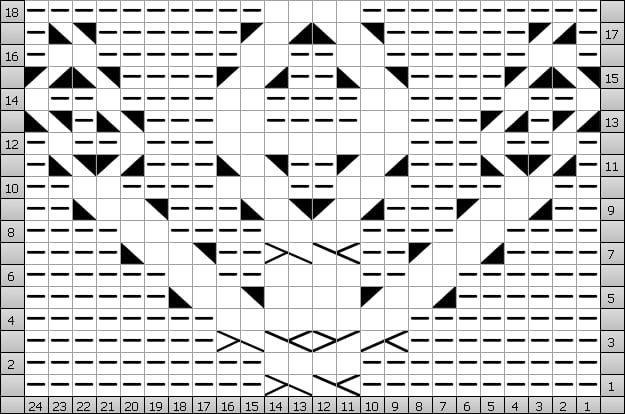
Row 1 (RS) : P10, C4F, P10
Row 2: K10, P4, K10
Row 3: P8, C4B, C4F, P8
Row 4: K8, P8, K8
Row 5: P6, T4R, K4, T4L, P6
Row 6: K6, P2, K2, P4, K2, P2, K6
Row 7: P4, T4R, P2, C4F, P2, T4L, P4
Row 8: K4, P2, K4, P4, K4, P2, K4
Row 9: P2, T4R, P3, T3R, T3L, P3, T4L, P2
Row 10: K2, P2, K4, P3, K2, P3, K4, P2, K2
Row 11: P1, T2R, T2L, P3, T3R, P2, T3L, P3, T2R, T2L, P1
Row 12: K1, P1, K2, P1, K3, P8, K3, P1, K2, P1, K1
Row 13: T2R, P1, T2R, P3, K2, P4, K2, P3, T2L, P1, T2L
Row 14: P1, K2, P1, K4, P2, K4, P2, K4, P1, K2, P1
Row 15: T2L, T2R, P4, T3L, P2, T3R, P4, T2L, T2R
Row 16: K1, P2, K6, P2, K2, P2, K6, P2, K1
Row 17: P1, T2R, P6, T3L, T3R, P6, T2L, P1
Row 18: K10, P4, K10
The pattern is worked in 18 row repeats following the pattern above.
Work rows 1-18 5 times
Work rows 1 and 2 one more time.
Bind / Cast Off lightly.
Abbreviations:-
C4B Slip 2 sts on to the cable needle, take them to the back of the work, knit the next 2 sts and then knit the 2 sts on the cable needle.
C4F Slip 2 sts on to the cable needle, take them to the front of the work, knit the next 2 sts and then knit the 2 sts on the cable needle.
K Knit.
P Purl.
T2L Twist 2 left - Cross 1st stitch in front, purl 1, knit 1.
T2R Twist 2 right - Cross 2nd stitch in front, knit 1, purl 1.
T3L Twist 3 left - Cross 1st and 2nd stitches in front, purl 1 , knit 2.
T3R Twist 3 right - Cross 2nd and 3rd stitches in front, knit 2, purl 1.
T4L Twist 4 left - Cross 1st and 2nd stitches in front over 3rd and 4th stitches, purl 2, knit 2.
T4R Twist 4 right - Cross 3rd and 4th stitches in front over 1st and 2nd stitches, knit 2, purl 2.
To Finish:
Weave in any yarn ends.
Without squashing the cables, press the knitted piece very lightly on the wrong side of work.
Cut a piece of fabric ½ “ larger all round than the knitted front (should be approx 15”square).
With the right sides facing , sew the fabric back to the knitted front , taking a ½ “ seam allowance on the fabric and sewing right to the knitted edge.
Turn the cover to the right way and insert a cushion inner. Sew the last side closed.
If you prefer working from charts then here is the chart for the 24 stitch centre panel:-
Interested in more cable cushions?
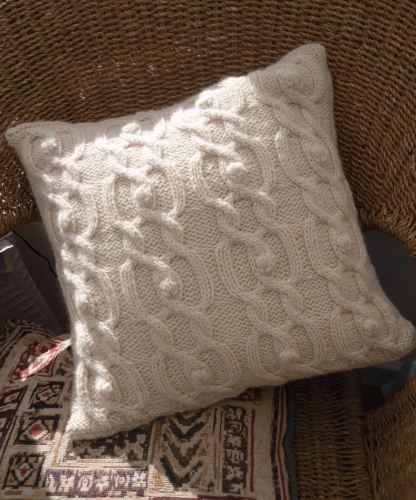
Knitting Kit available to knit this gorgeous cream cable cushion in Blue Faced Leicester yarn, truly scumptious.
These hand knitted ones are available in The Feminine Touch Designs web store too.
