
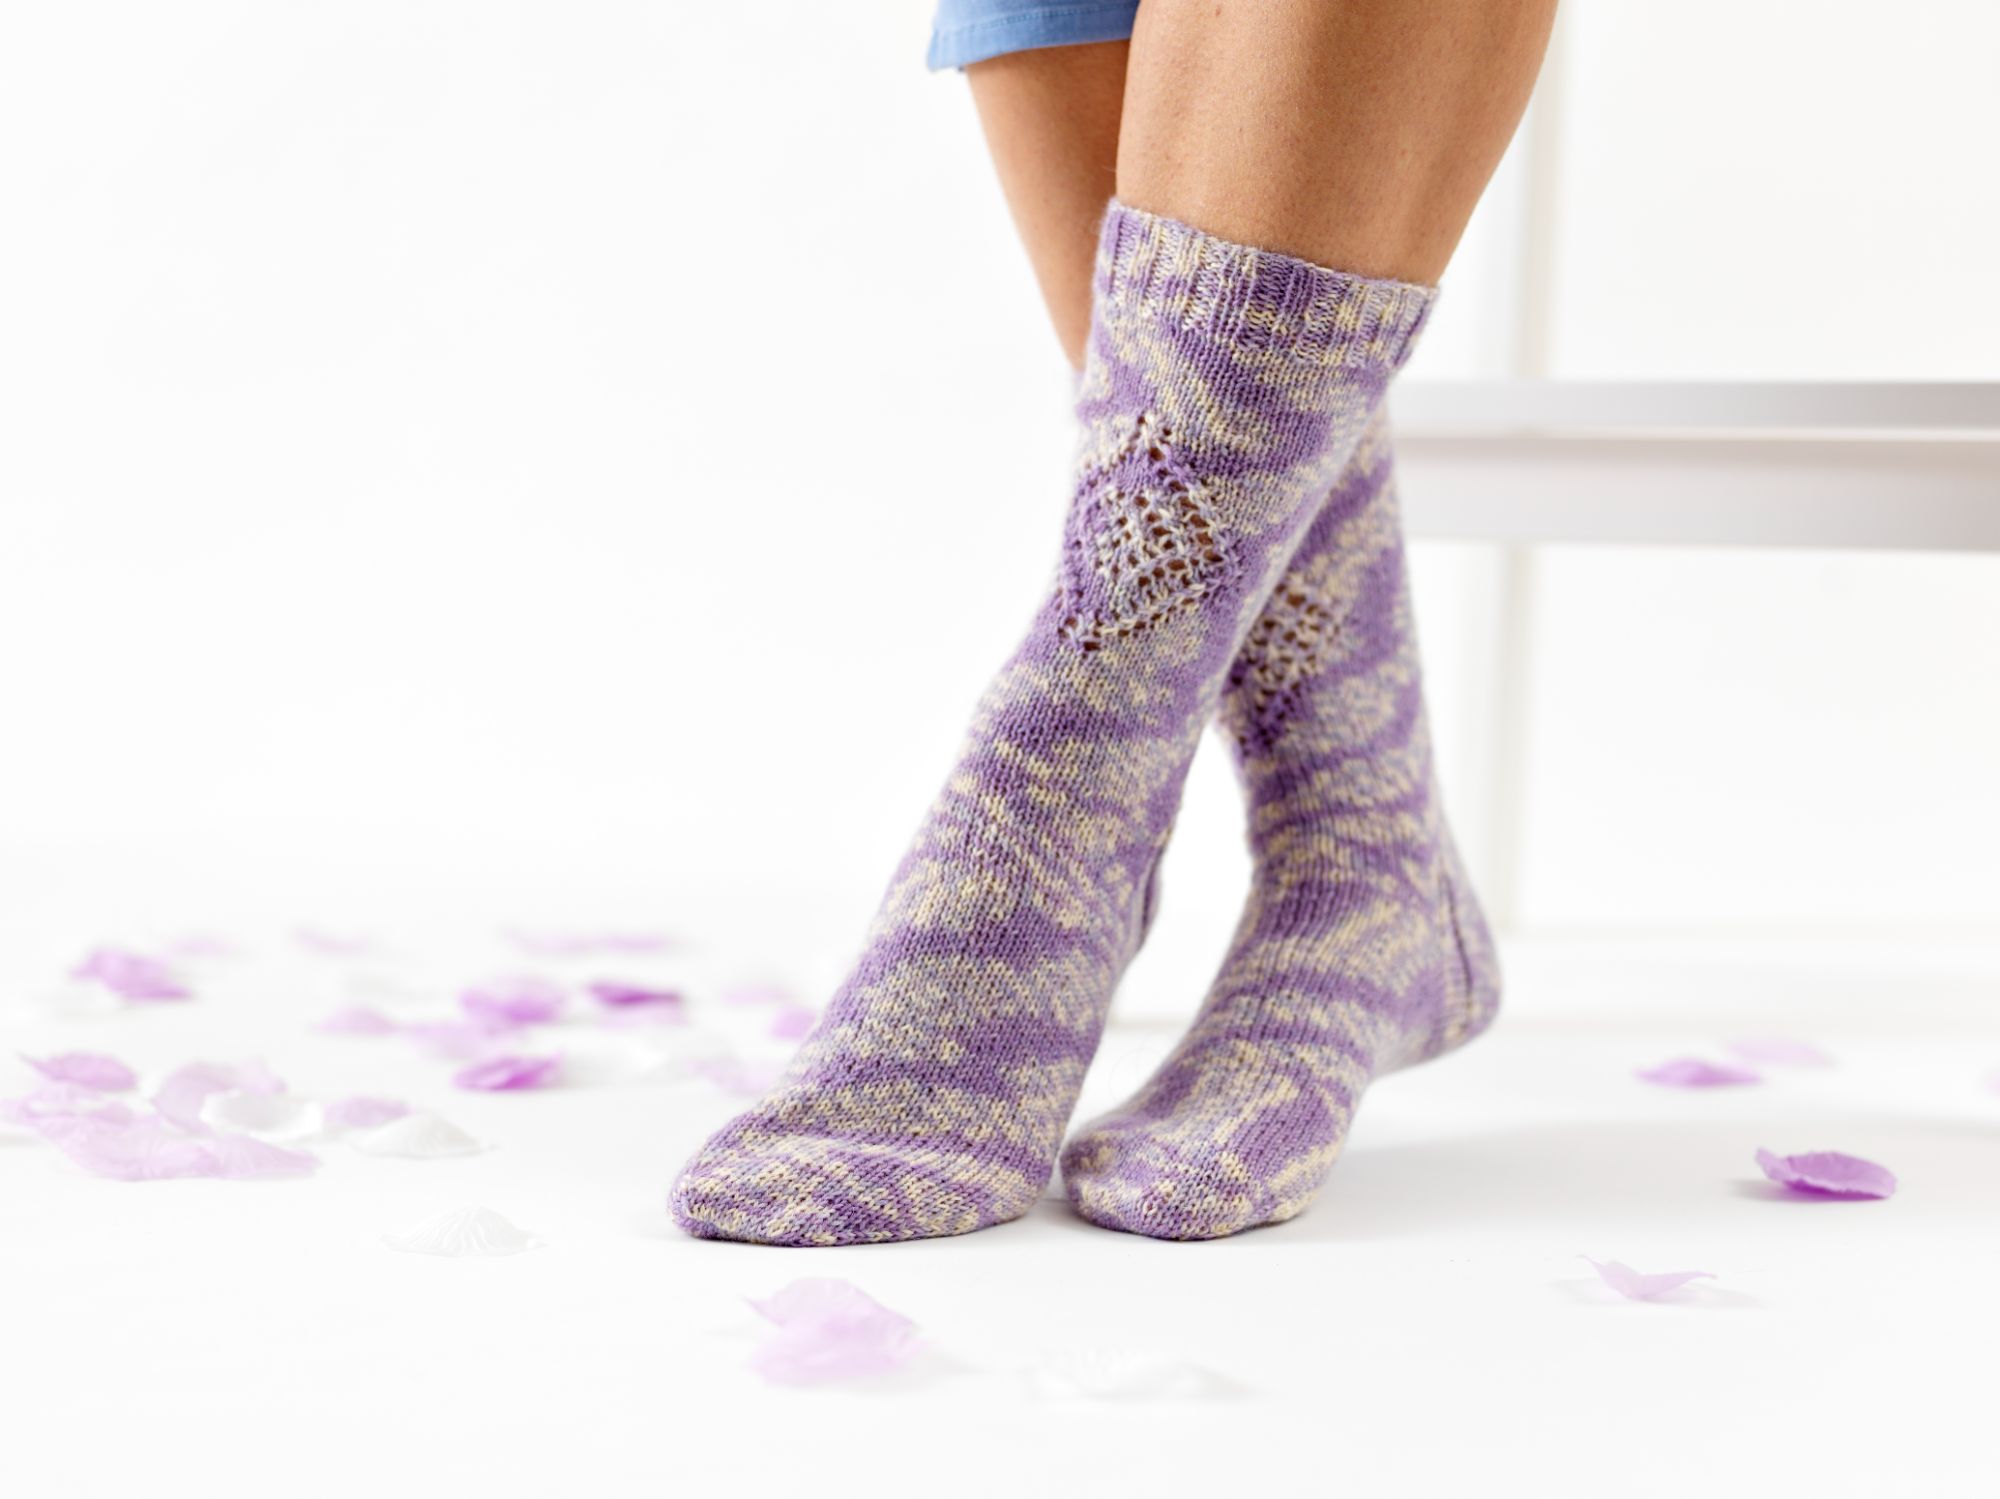
Learn to knit socks
Want to be able to print this out?
Easy knitted socks for an experienced knitter. This sock pattern takes you on a journey through the intricacies of sock knitting. I’ve kept things simple, explaining processes as I go along. To me sock knitting is a neat way for an experienced knitter to combat shaping and joining techniques and because you are knitting a pair you have 2 chances of trying the techniques before you put the pattern away and move on to your next project.
What you will need:
2 x approx 70 grams skeins of Stylecraft Aran with wool
1 set of 3.75mm DPN’s and a darning needle.
Sizes: Small, Medium and Large
Cuff 7.25 (8.25,9) inches around, Leg length 9.5 (10.5, 11.5) inches, Foot length 9 (10, 11.25) inches
Tension: 22 stitches and 30 rows for a 10x10cm tension square using 3.75mm in stocking stitch.
Yarn choice: I have chosen a thicker yarn (an easy wash yarn) which can be knitted on bigger needles. This way the socks will be knitted up quicker and you will see the results of your shaping a lot clearer.
Needle choice: You will use a set of 4 Double Pointed needles (DPN’s) so that 3 are arranged in a triangle and the 4th is used to knit. This is so you can divide the stitches into Heel, Front Left and Front Right sections when knitting and therefore will help you to be more organised.
Pattern choice: There are 3 main ways of knitting socks, from the toe up, from the cuff to the toe and adding the heel later. This pattern takes the sock from the cuff to the toe as this is what the majority of knitters in the UK do. I also love the magic of the Kitchener stitch at the very end x

Abbreviations
K Knit
K2TOG Knit two stitches together
P Purl
P2TOG Purl two stitches together
SL1 Slip one stitch
SSK Slip the next 2 sts, one at a time as if to knit, to the right needle. Insert the left needle into the fronts of these two sts & knit them together.
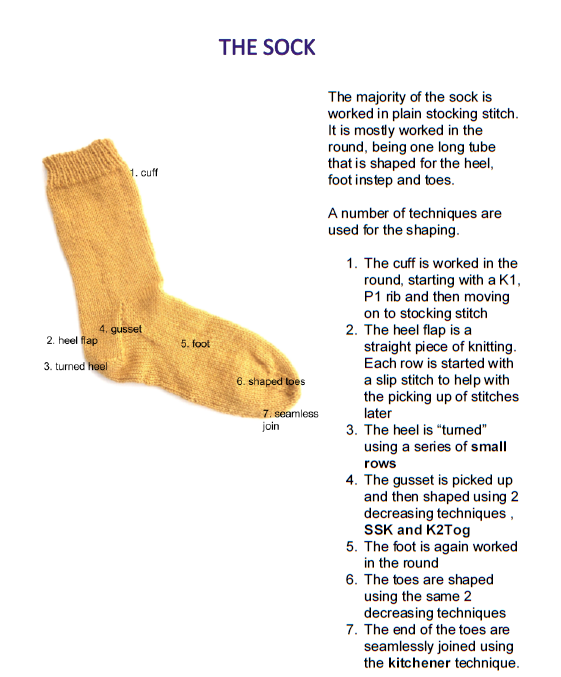
The cuff
These socks are cast on at the cuff, then worked in the round. The cuff is ribbed so it clings to the leg and is flexible and stretchy.
Using 3.75 DPN’s cast on 40 (44,48) stitches and join for working in the round making sure not to twist the stitches. Distribute the stitches evenly (as much as you can) along 3 of the DPN’s approx 14 (15, 16) stitches on each needle.
This great link explains the how to distribute your stitches and knit on DPN’s http://www.dummies.com/how-to/content/how-to-knit-in-the-round-on-doublepointed-needles.html
Work in K1, P1 rib for 10 rounds.
Next we work the leg which is worked as a tube which runs down to the heel. Knit all rounds until the work measures 7 (7.5, 8) inch in total
The Heel
At the end of the leg the sock is divided into half, half the stitches for the front of foot and the other half for the heel.
The heel starts out with a flat section that gets shaped into a cap to cup the ball of the foot. This shaping is often referred to as ‘turning the heel’.
We start with the heel flap which is knitted back and forth in rows on half the socks total stitches
Knit the next 20 (22, 24) stitches onto 1 DPN so you can easily work on the heel flap. Distribute the other 20 (22, 24) stitches on the other 2 DPN’s so that there is 10 (11,12) stitches on each and don’t work on these.
Each row is started by slipping the first stitch. This is IMPORTANT as this slipped stitched is used when picking up stitches later.
Row 1 (WS): Sl1, purl to end
Row 2 (RS): Sl1, knit to end
Repeat these 2 rows 8 (9, 10) times and row 1 again. Ending with the RS facing you.

The slipped stitch edge
Each "chain stitch" along the row edges represents two rows: the end of one row, and the beginning of the next.

The heel flap outside and inside views

Heal turning
Next the heel is turned to make a little cup shape. This is done by a series of short rows.
Row 1 (RS): Sl1, K12 (12,14), SSK, K1 turn work
Row 2: Sl1, P7 (5, 7), P2TOG, P1 turn work
Row 3: Sl1, knit to 1 stitch before the gap, SSK, K1, turn work
Row 4: Sl1, purl to 1 stitch before the gap, P2TOG, P1, turn work
Repeat rows 3-4 until all stitches have been worked 14 (14,16) stitches remain
Knit 1 row
Picking up stitches
Stitches are then picked up either side of the heel.
Pick up and knit 11 (12,13) stitches along the edge of the heel flap .
Knit the 20 (22,24) stitches across the top of the foot
Pick up and knit 11 (12,13) stitches along the other edge of the heel flap
Knit 7 (7, 8) stitches along the heel (half way across the heel).

how...
When picking up the stitches along the slipped-stitch row edge, insert your needle under both loops of each chain stitch, as seen here.
The Gusset/Instep
Distribute the stitches on the DPN’s as follows.
18 (19, 21) stitches from the heel flap edge and half the heel flap should be on 1 of the DPN’s.
20 (22, 24) stitches from the top of the foot should be on 1 DPN.
And then the remaining 18 (19, 21) stitches from the other heel flap edge and half the heel flap should be on the other DPN.
The sock is now joined back into a round ready for the Gusset/Instep part of the sock. The Gusset/Instep shapes the instep of the foot by a gradual decrease of stitches either side of the top of the foot. Gussets help ease the change of direction from a vertical leg to a horizontal foot and it helps the sock to fit the arch of the foot.
Rnd 1: Knit
Rnd 2: K15 (16, 18), K2TOG, K1, K20 (22, 24), K1, SSK, K15 (16, 18)
Rnd 3: Knit
Rnd 4: K14 (15, 17) , K2TOG, K1, K20 (22, 24), K1, SSK, K14 (15, 17)
Repeat rounds 3 - 4 a total of 8 (8, 9) times, reducing the number of stitches before the K2 TOG and SSK by 1 each time.
You should end up with
10 (11, 12) stitches on 1 DPN, 20 (22, 24 ) stitches on the DPN that goes across the front of the foot and 10 (11, 12) stitches on the other DPN.
The foot & toes
You will need the stitches distributed on the DPN’s in the same way when you get to the toes but to help you knit the foot, move some stitches around. I suggest you move 4 stitches at each end of the DPN that has 24 stitches on it along to the nearest DPN.
Continue working in the round until your work measures 7 (8, 9) inches from the back of the heel.
Move the stitches back on to the correct DPN’s.
10 (11, 12) stitches on 1 DPN, 20 (22, 24 ) stitches on the DPN that goes across the front of the foot and 10 (11, 12) stitches on the other DPN.
The toe of the foot starts at the base of the toes and is shaped so that it narrows towards the end of the toes. This shaping is done by decreasing 4 stitches on every other round as follows:
Rnd 1: K7 (8, 9), K2TOG, K1, K1, SSK, K14 (16,18), K2TOG, K1, K1, SSK, K7 (8, 9)
Rnd 2: Knit
Rnd 3: K6 (7, 8), K2TOG, K1, K1, SSK, K12 (14, 16), K2TOG, K1, K1, SSK, K6 (7, 8)
Rnd 4: Knit
Rnd 5: K5 (6, 7), K2TOG, K1, K1, SSK, K10 (12,14), K2TOG, K1, K1, SSK, K5 (6, 7)
Rnd 6: Knit
Rnd 7: K4 (5, 6), K2TOG, K1, K1, SSK, K8 (10,12), K2TOG, K1, K1, SSK, K4 (5, 6)
Carry on in this way until 16 (20,20) stitches remain.
Move 8 (10,10) stitches from 1 DPN to the other DPN with few stitches on so the work is now just on 2 DPN’s.
Cut the yarn leaving a 12 inch tail and now you are ready for the seamless grafting for the toes.

Grafting the toes
The Kitchener Stitch grafting is done by threading the yarn through the 2 sets of stitches following the stitch path.
This nifty technique is explained in full detail here - http://www.dummies.com/how-to/content/how-to-graft-stitches-head-to-head.html But…….
Because the grafting is done on 2 needles that are close together and there is no way to open the work out to see where the stitches need to go, the only real method of doing this work is to follow instructions. I find it easier to allow yourself time to do this where it’s quiet and you won’t be interrupted. You ideally need to work all the steps in one go because if you stop then it’s usually difficult to remember where you are in the process. So here goes-
Back Stitch = The 1st stitch on the needle at the back of the work
Front Stitch = The 1st stitch on the needle at the front of the work
Thread the darning needle with your the yarn that is still attached to the work.
Setting up
- Pass the needle through the Front Stitch Purlwise
- Pass the needle through the Back Stitch Knitwise
Repeat
- Pass the needle through the Front Stitch Knitwise
- Drop the Front Stitch off the needle
- Pass the needle through Front Stitch Purlwise
- Pass the needle through Back Stitch Purlwise
- Drop the Back Stitch off the needle
- Pass the needle through the Back Stitch Knitwise
Repeat steps 3 - 8 over and over again. After you've worked a couple of stitches, pause [being sure to complete step 8 so you'll know where to begin again] and tighten up the stitches using the end of the tapestry needle to tug at each loose loop in turn, working from the beginning of the join towards the last stitches worked.
Feel confident to knit some gorgeous 4 ply socks ?

Free Sock Pattern from WYS
£0.00

WYS Signature 4 ply Yarn - Bargain price
£.7.50
Free Sock Pattern from WYS